
Bagger Fitment 101: Bars, Cables, Exhaust, and Trim
When you roll up to a cruise night on a lowrider-inspired bagger—stretched frame, laid-back geometry, and that signature look—every detail says something about your builds. But none of that style matters if your handlebars, control cables, exhaust, and trim pieces aren’t fitted right. I’ve spent enough nights in the garage troubleshooting cable bind, exhaust rub, and trim gaps that shouldn’t exist. This guide walks you through the fitment essentials that keep your bagger running smooth, looking intentional, and ready for the road.
Key Takeaways
- Handlebar reach and rise directly affect control and cable routing. Measure twice, order once—a misfit setup costs time and frustration.
- Cable management prevents binding, performance loss, and premature wear. Slack and routing matter as much as cable quality.
- Exhaust fitment includes ground clearance, heat shield alignment, and mounting security. One rattle can ruin a show stop.
- Trim panels and badges require proper clip positioning and gap consistency to look intentional, not accidental.
- A fitment test ride on flat ground reveals problems before cruise night. Small adjustments save big embarrassment.
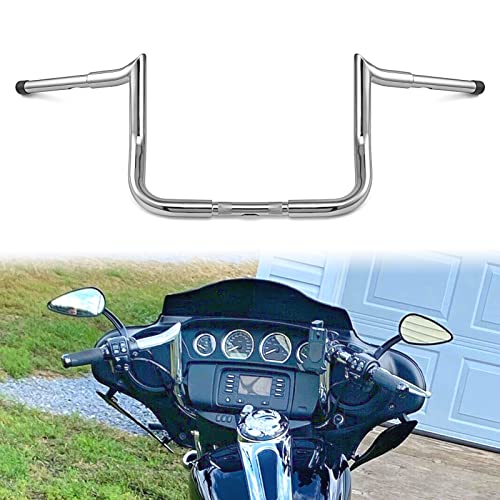
Understanding Bagger-Specific Handlebar Geometry
Baggers—especially cholo-style and Vicla-inspired builds—demand bars that complement stretched forks and lowered frames without creating control nightmares or cable routing chaos.
Most stock bagger bars sit around 30–32 inches wide and rise 10–14 inches from the clamp. For a laid-back aesthetic, you might go wider (34–38 inches) and lower (8–12 inches), but that geometry change affects throttle reach, brake line tension, and neutral steering feel. I’ve ridden baggers where the bar rise placed the throttle grip too far back, forcing my wrist into an unnatural angle after five miles.
Measuring for fit:
- Sit on the bike in your normal riding posture—weight on the seat, feet on the floorboards.
- Extend your arms naturally; your hands should rest on the grips without reaching or crunching.
- Measure the distance from the top of the seat to the bar centerline (rise).
- Measure the horizontal distance from the fork neck to the outermost part of each grip (reach/extension).
For stretched baggers, I typically aim for a 10–12 inch rise and 1–2 inches of forward reach beyond stock. This keeps the riding position upright and easy, the steering responsive, and cable runs predictable.
Bar clamp diameter matters too. Most Harley-style baggers use 1-inch clamps, but some customs run 1.25 inches. Verify your clamp size before ordering. A 1.25-inch bar won’t fit a 1-inch clamp without spacers or adapters—and those often introduce vibration and wear.
Cable Routing and Control Management
Here’s where precision pays off. Throttle, clutch, brake lines, and wiring all need clean paths from the handlebar to the engine and frame. Bind happens when cables kink, loop too tightly, or rub against sharp edges. Binding under load kills throttle response, makes clutch engagement unpredictable, and stresses cable housings until they fail.
The golden rules I follow:
- Minimum bend radius: Cables should never bend tighter than the diameter of a quarter. Sharper bends crack inner strands and cause stiction.
- No crossing in the same plane: If two cables cross, angle them so they don’t rub each other. A small spacer or cable spiral wrap prevents ongoing friction.
- Slack from bar to head tube: Leave 2–3 inches of slack at full handlebar turn. Test by rotating the bars lock-to-lock while watching for cable tightening.
- Secure all housings: Use cable clamps or adhesive-backed clips at 6–8 inch intervals. Vibration without support causes chafing and separation.
When I’m routing cables on a stretched bagger, I run the throttle cable up the left side of the fork, then curve it back toward the carb or fuel injection. Clutch cable typically runs up the right side, mirroring the throttle for visual balance. Brake lines sit lower, often tucked along the frame rails. Wiring harnesses get their own path—I zip-tie them to frame tubes, never bundled with fuel or hydraulic lines.
Test fit before final installation. Turn the bars through a full range of motion, rev the engine gently, and pull the clutch lever. Any cable should move freely without binding sounds or delayed response. If something catches, unbind it now. Waiting until ride time is how small problems become roadside repairs.
Exhaust Fitment: Clearance, Heat, and Mounting Security
Exhaust fitment on a lowrider-style bagger is less forgiving than a stock bike. Lowered frames, stretched swingarms, and custom floor boards all reduce clearance. A drag or rattle on a cruise night isn’t just annoying—it says your build wasn’t thought through.
Ground clearance is the first concern. Measure the distance from the lowest part of your custom exhaust pipe to the ground with the bike on a level surface, fully loaded (you on it). Aim for at least 3–4 inches. If you’re running a 2-into-2 or 2-into-1 header setup typical on baggers, the primary pipes run under the frame rails. Lower frames mean tighter clearance. I’ve seen beautiful exhaust systems scraped and dented because the builder didn’t account for a 2-inch frame drop.
Heat shield alignment prevents meltdowns—literally. Aftermarket slip-on mufflers or headers often come with removable heat shields. Make sure the shield sits 0.5–1 inch away from the pipe surface and doesn’t contact the frame, floor boards, or wiring. A heat shield touching a fuel line is a fire risk. I use small metal spacers under the shield mounting points to ensure consistent clearance.
Mounting stability matters for appearance and longevity. Exhaust systems should mount at a minimum of three points—usually two on the header clamps and one on the muffler bracket. Each mount should be tight but not over-torqued (exhaust metal cracks easily). Use stainless or high-temp locating washers to prevent vibration loosening. Before taking the bike on a cruise, sit on it and listen. If you hear a rhythmic rattle, trace it to the source. Usually it’s a loose bracket bolt or a heat shield clip.
Thermal considerations on baggers: With stretched frames and saddlebags, airflow around the exhaust is restricted. I always check muffler surface temperature after a 20-minute steady cruise. If it’s too hot to hold your hand near (can’t touch it for more than two seconds), consider wrapping the muffler with high-temp insulation. Saddlebag leather can melt or discolor from radiant heat, and passengers notice when exhaust burns their leg.
Trim, Panels, and Badge Fitment
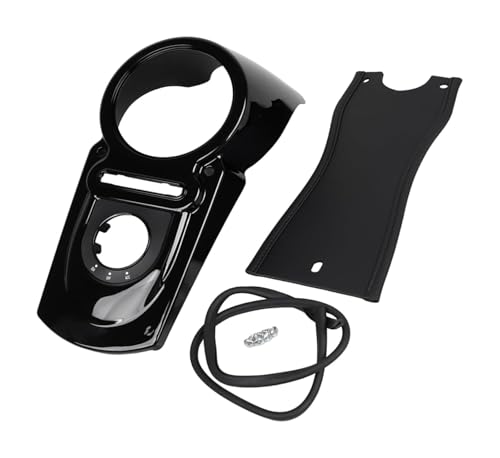
The visual finish is where your bagger either looks dialed-in or thrown together. Trim pieces—side covers, rear fender trim, engine trim rings, and badges—all need consistent gaps and secure attachment.
Gap consistency is the detail that separates a professional build from a backyard job. I measure the gap between the main frame and any trim panel at three points: top, middle, and bottom. Aim for 2–3 mm consistently. If the top is 2 mm and the bottom is 5 mm, the panel isn’t sitting flat. Loosen the mounting clips, adjust, and re-check. A tight, uniform gap signals precision.
Mounting clips and fasteners vary by component. Most Harley-style bagger trim uses press-on adhesive clips or small-diameter screws. The adhesive clips grip well but don’t forgive misalignment. I dry-fit panels on clean surfaces, then apply one clip at a time, pressing firmly for 30 seconds. Rushing the installation guarantees a panel that pops off on the road.
For screw-mounted trim, use stainless or chrome fasteners that match the aesthetic. A single rough or rusty screw breaks the whole vibe. I hand-tighten trim screws just past snug—over-tightening strips the hole or cracks brittle plastic.
Badges and emblems get their own attention. Chrome or polished steel badges look incredible on a well-maintained bagger. Use the adhesive pads provided, or for permanent installation, drill small holes and use stainless screws with washers. Position badges in line with existing design elements (seat seams, frame lines) so they feel intentional. Crooked badging looks rushed.
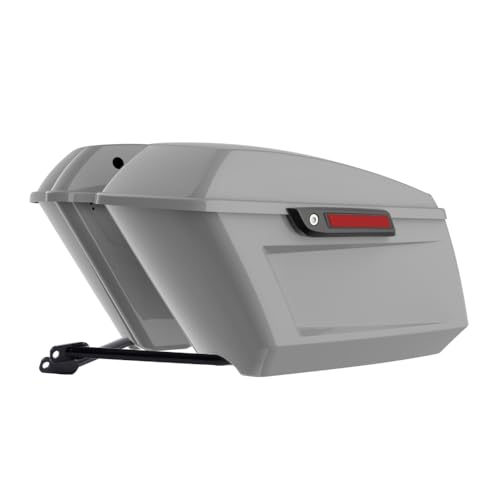
Leather saddlebags and ancillary trim need secure mounting but also some forgiveness for vibration. I use rubber-lined mounting brackets wherever possible. The rubber absorbs buzz and prevents bags from chafing. Check these every few weeks—leather shifts slightly over time, and a bracket that’s tight now might be loose after 500 miles.
Fitment Checklist and Comparison
Here’s a practical reference for your bagger build or refresh:
| Component | Stock Range | Stretched/Lowered Bagger | Fitment Check |
|---|---|---|---|
| Handlebar Rise | 10–14” | 8–12” | Wrist comfort at full throttle; neutral steering feel |
| Handlebar Width | 30–32” | 32–38” | No interference with saddlebags; cable reach tested |
| Throttle Cable Slack | 1–2” | 2–3” | Full bar rotation without binding |
| Exhaust Clearance | 4–5” | 3–4” (minimum) | Clearance check with loaded weight; heat testing |
| Muffler Heat Shield Gap | 0.75–1” | 0.75–1” | No contact with frame or fuel lines |
| Trim Panel Gap | 2–3 mm | 2–3 mm | Uniform at three measuring points |
| Badge Alignment | Centered on panel | Centered on panel | Positioned in line with frame/seat design elements |
The Test Ride and Final Adjustments
Before cruise night, I always do a flat-ground test ride. The route is simple: start on level pavement, ride straight for 30 seconds, then perform gentle turns in both directions. Here’s what I’m listening and feeling for:
- Throttle response – Should be immediate and smooth, no hesitation or delay.
- Steering feel – Should be predictable; no sudden heaviness or looseness.
- Cable rattle – Any noise from the handlebar area means something’s loose or binding.
- Exhaust rattle – Listen carefully for metallic ticking or buzzing underneath.
- Trim and panel security – Feel for any movement at the seat, side covers, or fenders.
If you hear or feel anything off, stop and diagnose. Most fixes are simple: a cable clamp needs tightening, a trim bracket needs adjustment, or a heat shield needs a spacer. These small corrections take 10 minutes in the garage and prevent embarrassment at the cruise.
FAQ
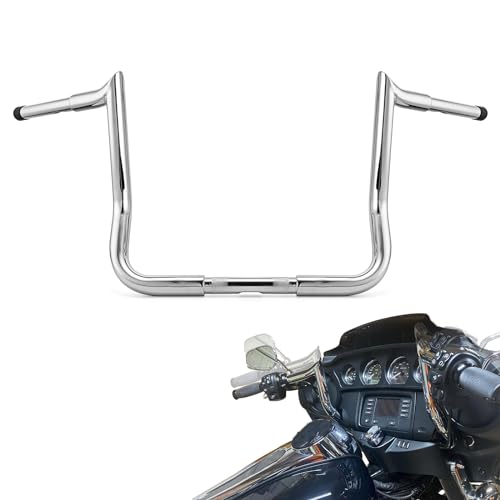
What’s the best handlebar width for a stretched bagger without sacrificing steering response?
For most stretched baggers, I recommend staying between 32 and 36 inches. Wider bars (38+ inches) start affecting steering feel, requiring more arm movement to change direction. They also make lane positioning trickier in traffic. At 34–36 inches, you get that laid-back, cruising aesthetic without sacrificing control. The key is balancing width with the correct rise; taller bars (11–13 inches) on a stretched frame feel natural and upright.
How do I know if my cables are too tight or binding?
Test it by turning the handlebar through a complete lock-to-lock rotation while the bike is off and the engine is cold. Your throttle should snap back smoothly when you release it. If it returns slowly or feels sticky, binding is likely. Also listen for a creaking or popping sound as you turn the bars fully in each direction. Binding often creates an audible noise. If you suspect a problem, try slightly loosening the cable at the carb or fuel injection point by one-quarter turn, then re-test. Even a millimeter of slack can eliminate binding.
Can lowered baggers run stock exhaust, or do I need an aftermarket system for clearance?
Depends on how much you’ve lowered. A 1.5-inch frame drop usually clears stock exhaust with 3–3.5 inches of clearance remaining—doable but tight. A 2-inch drop starts pushing limits. I’ve seen riders scrape their exhaust going over railroad tracks or steep driveways. If you’ve lowered more than 1.5 inches, I’d recommend checking actual clearance with the bike fully loaded. If you’re concerned, aftermarket two-into-one or -into-two systems designed for baggers offer better clearance and usually look better anyway. The investment pays off in peace of mind.
What’s the proper way to secure saddlebags so they don’t rattle but also don’t stress the frame?
Use rubber-lined mounting brackets at the frame and over the rear wheel area—usually three secure points minimum. Tighten the brackets snugly, but don’t over-torque. The rubber lining is designed to absorb vibration and micro-movement. Avoid bolting directly through the leather; let the bracket hardware handle the load. Check bracket tightness every 500 miles. Vibration causes small movements that accumulate. I also recommend using thread-locking compound (removable type) on bracket bolts to prevent creep.
How far back should badges or emblems sit on my saddlebags for that intentional look?
Position badges roughly 3–4 inches from the top edge of the bag, centered horizontally on the leather. This placement mirrors factory badge positioning on heritage models and looks balanced. Avoid placing them too high (looks awkward) or too low (gets obscured). If your bags have design stitching or contrasting panels, align badges with those elements. This creates visual harmony. Step back and look at the bike from 10 feet away; does the badge placement feel right? Your eye is usually the best guide.
Final thoughts: Fitment isn’t glamorous, and it won’t get the Instagram likes like a fresh paint job or new chrome. But when your bagger handles predictably, looks intentional in every detail, and makes it through a full cruise night without a rattle or hiccup, that’s the real flex. Take your time with bars, cables, exhaust, and trim. Test everything before you roll. Your future self—and your reputation—will thank you.