
Long-Ride Comfort and Rain Kit for Touring Baggers
Touring on a lowrider bagger for hours requires the right gear to stay comfortable, dry, and focused on the road—not on aching joints or wet layers. Whether you’re cruising down coast highways or linking cruise nights across state lines, a thoughtfully assembled long-ride comfort and rain kit separates the riders who arrive fresh from those who limp home exhausted.
I’ve spent enough Saturday afternoons helping club brothers dial in their touring setups to know that comfort isn’t luxury on a bagger—it’s logistics. Rain prep, seat support, wind protection, and accessible storage transform a three-hour ride into something you’ll actually want to repeat.
Key takeaways
- Seat comfort is foundation: Gel overlays, aftermarket touring saddles, and lumbar support pads reduce fatigue on rides over two hours.
- Rain kit needs fast access: Waterproof saddlebag organizers, compact rain suits, and quick-dry microfiber towels should stay within arm’s reach.
- Layer strategically: Windproof base layers, insulating mid-layers, and removable outer shells adapt to temperature swings on long routes.
- Cargo management matters: Weatherproof dry bags and saddlebag dividers keep essentials organized without shifting during turns.
- Recovery gear cuts fatigue: Padded grips, handlebar-mounted cup holders, and compact first-aid kits support endurance and rider confidence.
Understanding Long-Ride Fatigue on Baggers
Touring baggers sit you upright and stable—a huge advantage over sport bikes—but the relaxed posture and extended throttle control put unique stress on your lower back, shoulders, and wrists over four-plus hours. I’ve ridden plenty of club cruises where riders with no prep arrived with sore lumbar spines and numb hands. Then I’ve seen others pull up fresh because they’d invested an afternoon in setup.
The bagger’s weight and rider-forward seating mean your core absorbs road feedback differently. Without active support, fatigue compounds. You start tensing shoulders to compensate, grip the throttle tighter, and suddenly a fun weekend run feels like work.
Rain complicates this: wet gear reduces mobility, cold rain triggers shivering (which burns energy and destabilizes your steering), and visibility stress adds mental load to physical fatigue.
The solution isn’t buying a completely new bike—it’s building a comfort system that works with your bagger’s geometry and your body’s needs. I’ve tested enough overlays, rain jackets, and handlebar mods in my garage to know what shifts the equation.
Seat and Lumbar Support Systems
Your seat is ground zero. Stock bagger seats are serviceable but not designed for three-hour-plus distance comfort. Aftermarket touring saddles (often firmer than cruiser seats, with better contouring) run $300–700 and last through multiple cross-country runs. I’ve ridden the same gel-memory-foam seat overlay for two seasons; it cost about $80 and genuinely reduces pressure on sit bones after hour two.
Lumbar support pads ($40–120) bolt to the backrest and angle slightly forward to support the natural curve of your lower spine. Many work with OEM baggers or slip under your existing seat cover. I’ve seen club riders add them after complaining about back soreness—usually the difference between “I’m sore” and “I could ride again tomorrow.”
Positioning matters as much as padding:
- Ensure your pegs aren’t so forward that your knees angle sharply; this strains the lower back.
- Keep your seat height balanced—too high loads your arms; too low compresses your spine.
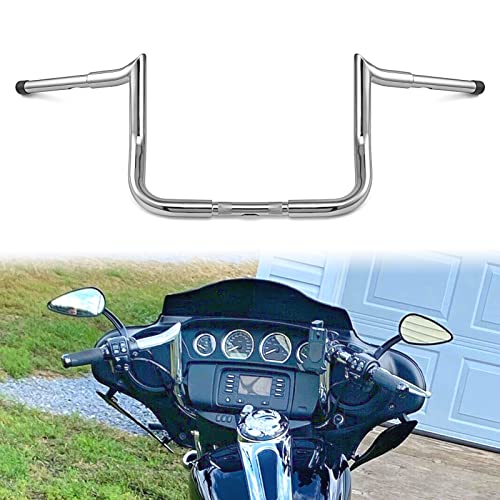
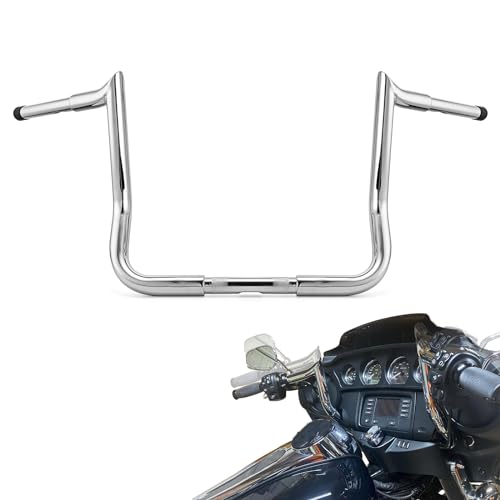
- Consider handlebar risers if your reach forces you into a hunched posture over long miles.
For serious distance riders, a heated seat pad (12V compatible, thermostat-controlled) does double duty: lumbar warmth reduces muscle stiffness, and heat circulation improves blood flow during cold-weather runs. I tested one on a late-fall ride into the desert; the difference in leg stiffness at hour four was measurable.
Waterproof Storage and Rain Gear Organization
Long-ride rain prep starts before you leave the garage. A solid rain kit stays accessible and organized so you don’t panic-stuff wet gear into your saddlebags at the first drops.
Weatherproof saddlebag organizers ($30–70 per pair) are essentially rigid, compartmented inserts that fit inside soft saddlebags or are attached to luggage racks. They keep your phone, wallet, and jacket where you can grab them without dumping everything. I keep mine separated: one bag holds my rain suit and towels; the other holds road snacks, cash, and my multi-tool. When weather pops, I’m not rifling through a dark bag.
Quick-dry microfiber towels are essential—lighter and faster than cotton, and compact enough to roll into your handlebar bag. A set of two runs $15–25. After pulling over in a downpour, having a dry surface for your hands and visor makes the next stretch of riding safer and less frustrating.
A compact rain suit designed for motorcyclists (not rain-forest hikers) should check these boxes:
- Over-jacket fits over your riding jacket with room for layering underneath.
- Pants open at the inseam for quick on-off without removing your boots.
- High-visibility piping or colors reduce visibility loss in heavy rain.
- Packed size fits in a medium saddlebag; mine rolls to roughly loaf-sized.
I prefer two-piece rain suits over full-body onesies for bagger riding: you can peel off just the jacket in light rain or traffic without stopping completely, and pants stay in your bag until conditions demand them.
Waterproof dry bags ($20–50 for a good set) function as saddlebag liners and emergency containers. I pack one with a sealed change of socks, gloves, and a thin base layer under my seat; if you get caught between stops, you can peel off the worst wet stuff and stay mobile. Trust me: dry socks make a psychological difference on long rides.
Layering Strategy for Temperature and Wind Control
Bagger touring takes you across elevation changes, time zones, and seasonal pockets. What’s 75°F and sunny at sea level becomes 58°F and windy thirty miles inland. Layering beats overdressing, and strategic pieces eliminate the “did I pack the right jacket?” anxiety.
Start with a windproof base layer: merino-wool or synthetic (avoid cotton—it traps moisture). A quality long-sleeve base layer ($40–70) wicks sweat and blocks wind chill when you stop for fuel. I wear one year-round under my riding shirt; it’s thin enough to forget about, but makes solo cruise runs in coastal wind manageable.
Middle layer: fleece or lightweight down vest ($60–120). Stuffs into a saddlebag or seat bag. When temperature drops, it’s faster to add a vest than to fidget with a whole new jacket.
Outer layer: your main riding jacket, plus the rain suit already covered. The key is making sure your riding jacket accommodates layering; overly tight jackets feel like a straitjacket with three layers underneath.
Extremity management is underrated on long baggers:
- Insulated, wind-blocking gloves ($50–100) designed for cruiser riders sit looser than sport-bike gloves, so they’re less fatiguing after four hours. I swap my summer gloves for winter ones around Halloween; the difference in hand numbness on a 2-hour pre-dawn cruise is immediate.
- Merino-wool socks ($12–20 per pair) compress less than cotton and regulate temperature without bulk. Two pairs in your dry bag are insurance.
Wind protection isn’t just comfort—it’s endurance. Cold hands and numb feet trigger tension, which compounds shoulder and wrist fatigue. Staying warm means staying relaxed, which extends how far you can safely ride in a day.
Accessible Recovery and Fuel Gear
Long-ride comfort includes gear that lets you recover at stops and handle minor roadside situations without dismounting in crisis mode.
Handlebar-mounted cup holders ($15–35, ranging from basic to insulated) let you sip water while riding or parked. Dehydration sneaks up on riders, especially in desert or high-heat touring. I mounted one on my bagger two years ago, and I drink more water because it’s there; that small habit change noticeably smoothed out mental fatigue on six-hour runs.
Compact first-aid kits tailored for riders ($25–50) should include:
- Blister pads and athletic tape (chafing on long rides is real).
- Anti-diarrheal and pain reliever (gas-station food happens).
- Antihistamine and small hydrocortisone cream (bug bites, minor rashes).
- Sterile gauze and wound closure strips.
I keep mine in a zippered case in my saddlebag; it’s taken up almost no room, but it’s covered three stops in three years: a blister, a bug bite that itched like crazy, and a minor scrape from adjusting my kickstand too fast on gravel.
Padded handlebar grips ($30–70, depending on quality) aren’t purely aesthetic—they reduce hand fatigue and vibration transmission. A quality gel or memory-foam grip set lets your hands feel fresher after four hours than stock rubber. I upgraded my bagger’s grips two years back and can genuinely feel the difference; my fingers don’t feel numb at rest stops anymore.
Seat bag or under-seat organizer ($40–100) keeps your essentials (keys, phone charger, trail mix) within reach without opening your saddlebags. Mine holds my multi-tool, a small tire-pressure gauge, and a spare ignition fuse—roadside small emergencies that don’t require a full tool roll.
Cargo Management and Packing for Long Hauls
A touring bagger’s strength is its carrying capacity; the trap is overstuffing. I’ve seen club members load saddlebags so heavy that they’re fighting the bike through corners by hour three.
Weight distribution: Keep heavier items (spare tire, tools) low and centered. Lighter gear (rain suit, snacks) higher or outboard.
Saddlebag dividers and internal organizers ($25–50) prevent your gear from becoming a jumbled mess. I use one set per bag: left holds riding gear and recovery items, right holds snacks, phone charger, and paperwork. When I need something, it’s where I expect it, and I’m not spilling the entire bag onto a rest-stop bench.
Locking mechanism: If your bagger has soft saddlebags, a cable lock through the zippers and frame ($15–30) deters casual theft when you’re inside a diner. Not foolproof, but it raises the bar.
Weight limit reality check: Full leather touring saddlebags cap out around 60 lbs safely on most baggers; soft bags a bit less. That includes the bag weight itself. Factor that before you load two weeks’ worth of gear for a weekend run. I weigh my packed bags on a bathroom scale in my garage before long trips—it sounds paranoid, but it’s caught me over-packing twice.
Comparison: Long-Ride Comfort Kits by Touring Distance
| Kit Component | Day Rides (2–3 hrs) | Weekend Tours (6–10 hrs) | Cross-Country (20+ hrs) |
|---|---|---|---|
| Seat Upgrade | Stock + gel overlay | Aftermarket touring saddle | Premium saddle + lumbar pad + heated pad |
| Rain Gear | Compact rain suit + towels | Full rain suit + dry bag + backup towels | Rain suit + multiple dry bags + foul-weather pants |
| Gloves | Summer cruiser gloves | Wind-blocking gloves + backup pair | Insulated + waterproof + backup leather pair |
| Base Layers | None or light | Merino base layer + fleece vest | Full system (base + mid + outer) with spares |
| Recovery Gear | Phone charger, snacks | First-aid kit + handlebar cup holder | First-aid kit + padded grips + handlebar holder + muscle balm |
| Storage | Main saddlebag | Organized saddlebag + seat bag | Organized saddlebags + seat bag + under-seat storage |
| Estimated Investment | $100–200 | $400–700 | $1,000–1,500 |
Building Your Rain Kit: A Garage Workflow
Here’s how I assemble and test a rain kit before a long ride:
Week before departure:
- Lay out your rain suit and test the fit over your planned riding layers. Movement should feel natural; zippers and closures should operate smoothly.
- Pack your dry bag with the change of socks, base layer, and towels. Confirm it seals and fits in your chosen saddlebag.
- Test your handlebar cup holder with a filled water bottle. Make sure it doesn’t catch wind noise or vibrate.
Day before:
- Check weather forecast for the route. Adjust your layer selections (extra fleece if temps drop; lighter base layer if warm).
- Confirm your first-aid kit is intact and accessible.
- Top off fuel and do a quick safety check: tire pressure, lights, brakes.
Morning of:
- Mount your cup holder and fill it (or wait until your first stop).
- Confirm your saddlebag organizers are in place and zipped.
- Test your grips—make sure they feel good at a standstill; if something feels off, you’ll notice immediately.
This prep takes 20 minutes and eliminates dozens of “oh man, I should have brought X” moments mid-ride.
FAQ
How do I know if my bagger needs a seat upgrade?
If your sit bones ache after two hours, or if you find yourself shifting position constantly to find relief, your seat isn’t supporting long rides well. Gel overlays are the low-cost test ($60–80); if that helps, consider an aftermarket saddle. If you’re comfortable after two hours but sore at four, a lumbar pad might be your answer instead. The honest answer: if you’re questioning it, take a test ride on a friend’s upgraded bagger. The difference is noticeable.
What’s the minimum rain kit I should carry on day cruises?
A compact rain suit (packed to roughly loaf-sized), two microfiber towels, and a small dry bag with one change of socks. That’s maybe 2 lbs and fits in a medium saddlebag. I’ve used the towels and dry bag more often than the rain suit, but the suit has saved me twice in surprise downpours. It’s cheap insurance.
Are waterproof dry bags necessary if I have saddlebags?
Not strictly, but they’re genuinely useful. Soft saddlebags aren’t designed to be fully waterproof; drive rain and extended exposure will eventually seep through. A waterproof dry bag protects your documents, phone, and change of clothes. Think of it as a last line of defense. I’ve ridden in rain without one and arrived wet and stressed; with one, I arrived wet but calm.
How much weight can I safely carry in saddlebags on a bagger?
Most soft-bag baggers max out at 50–60 lbs total (including the bag weight). Hard cases and luggage racks vary, but your owner’s manual is the authority. I weigh my bags before long trips; it takes two minutes and prevents overloading. Overweight bags affect handling and tire wear, especially in corners or emergency maneuvers.
Should I invest in handlebar risers for long rides?
If you find your reach uncomfortable (either too stretched or too hunched) after an hour, yes. Risers cost $50–150 and are a one-time investment that adjusts your entire posture. I tested my bagger without risers, then added them, and my arm fatigue dropped noticeably. Comfort is personal, though; test a friend’s setup before buying.
What’s the difference between a rain suit and a regular waterproof jacket?
Motorcycle rain suits are designed with seams sealed, ventilation tabs, and high-vis striping to stay visible in weather. They also fit over a riding jacket without restricting arm movement. Regular waterproof jackets often aren’t sealed and don’t account for the posture and grip needed on a bike. For touring, a dedicated moto rain suit is worth the modest premium ($80–150 for a quality two-piece).
Wrapping Up: The Long-Game Investment
Long-ride comfort isn’t a single purchase—it’s a system you build and refine over seasons. I spent three years tweaking my bagger’s setup: first a gel overlay, then padded grips, then a lumbar pad, then a rain kit organizer. Each piece was affordable, and each one quietly improved how far I could ride without arriving exhausted.
The best part? These upgrades don’t just help on marathon runs. They make short cruises to the local Saturday night gather more enjoyable too. Comfort pays dividends every time you swing a leg over the seat.
Spend your first touring season collecting the basics: a solid rain suit, weatherproof storage, and basic recovery gear. Then listen to your body. If your hands hurt, upgrade the grips. If your back aches, test a lumbar pad. If you’re cold, layer up with a merino base layer. That feedback loop—riding, observing, adjusting—is how you build the kit that actually matches your bike and your body.
Your bagger is built for cruising and looking good while doing it. A thoughtful comfort kit just makes sure you enjoy the whole ride.