
Cholo Bagger Style Upgrades: What Amazon Can and Cannot Do
When you’re building a low-rider-inspired bagger that turns heads at the cruise night, you’ll find Amazon is a goldmine for chrome accents, lighting kits, and security gear—but it’s not a substitute for skilled fabrication and custom frame work. Here’s what I’ve learned after years of documenting builds: knowing the difference between bolt-on upgrades that ship fast and the deep customization that requires a lift and a welder will save you time, money, and disappointment.
Key Takeaways
- Amazon excels at bolt-on chrome, lighting, and maintenance supplies that enhance cholo aesthetics without welding.
- Custom fabrication—frame drops, extended forks, hardtail conversions—requires a shop and cannot be outsourced to retail.
- Quality wiring harnesses and security systems are available online, but installation demands clean routing and electrical knowledge.
- Whitewall tires, spoke kits, and paint protection are achievable upgrades with the right tools and patience.
- Fast shipping doesn’t guarantee fitment; measure twice and read fitment notes before ordering.
What Amazon Does Best: Bolt-On Upgrades and Chrome Dress-Up
I’ve built enough baggers to know that 70% of the visual impact comes from accessories you can bolt on in your garage. The beauty of the cholo bagger aesthetic is that it rewards clean, shiny details: chrome trim, custom mirrors, fender accents, and foot pegs that catch light.
Chrome foot pegs and floorboard kits are my go-to starter upgrades. They mount to your existing frame and footrest points in under an hour. Look for brands that offer stainless steel or plated finishes—rust is the enemy on a long bike, especially if you’re cruising in humid climates. I’ve tested kits that promised “permanent shine,” and the honest ones include a basic cleaning cloth and protection wax. Don’t skip the wax; it’s your first line of defense against oxidation.
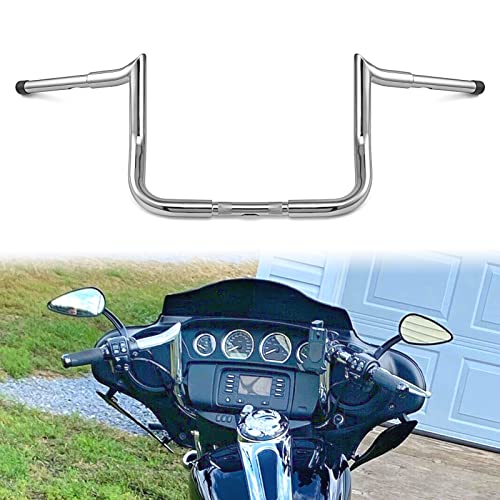
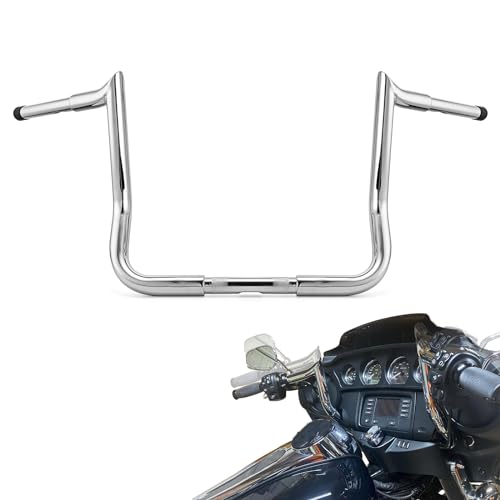
Custom handlebar grips and bar ends are equally painless. Most Harley and cruiser grips slide right onto your existing bars. The visual payoff is immediate—flamed, studded, or ribbed grips change the entire hand-forward vibe. I prefer grips with integrated throttle and brake lever sleeves, which create that unified look without extra fasteners.
LED lighting upgrades—tail light bezels, turn signal housings, and accent strips—flood the market, and for good reason. They’re modular, reversible, and give your bike that modern-meets-retro glow that’s central to the lowrider-inspired bagger movement. Red neon underglow and white side marker strips are classics; just check your local road laws before committing. Some jurisdictions restrict underglow colors, and I’m not here to tell you to break the law. I’m here to help you build clean.
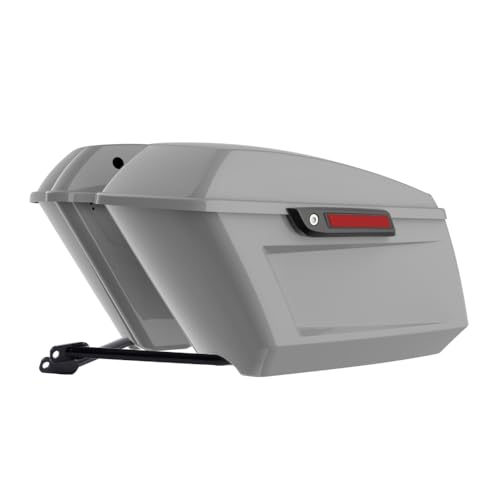
Mirror upgrades and fender fluff round out the easy wins. Replacement mirrors with extended stalks, chrome-plated covers, and custom angles are all available. Same with fender trim strips, side cover badges, and tank decals. These take 15 minutes to install and cost $20 to $60 per piece.
The rule I follow: if it’s purely decorative, bolts to existing structure, and doesn’t require cutting, welding, or electrical integration beyond simple plug-and-play, Amazon can deliver it fast and reliably.
What Requires a Shop: Frame and Suspension Work
Here’s where Amazon’s limitations become crystal clear, and where I have to be honest about what you can and cannot DIY in most garage setups.
Frame drops and lowering blocks are the spine of cholo bagger style. A true frame drop—where you cut the rear subframe, lower it 3–6 inches, and re-weld it with reinforced gussets—is not a mail-order job. This is precision welding, frame geometry, and weight distribution. I’ve seen bikes where a backyard lowering job cracked the frame or destroyed handling. Suspension geometry matters; lower isn’t always better if your rake angle, wheelbase, and center of gravity are compromised.
Amazon sells lowering kits (pre-fabricated drop units and shims) for some models, and those are legitimate shortcuts if they’re engineered for your specific bike. But true custom frame drops? That’s a fabricator’s work. Budget $800–$2,500 for quality lowering, and expect to spend time in a shop with someone who knows Harley geometry.
Extended front forks are another non-negotiable shop item. Stretching your front end 4–8 inches (a classic cholo move) requires new fork tubes, extended axles, modified triple trees, and complete front-end steering recalibration. Improper fork extension ruins handling and can make your bike unsafe. This is not a “buy-it-and-bolt-it” scenario. Quality fork extensions start around $1,200 and go up from there. A good fabricator will also ensure your new rake angle works with your frame drop.
Hardtail conversions or rigid rear-end setups eliminate the swing arm and rear shocks for that stretched, low-slung look. This is fabrication at its core: you’re replacing the entire rear suspension system, routing brake and wheel speed lines, and verifying frame strength. Amazon has no role here. A hardtail build costs $2,000–$5,000 in labor and materials, and it’s absolutely a job for someone with a lift, jigs, and a frame history.
I won’t ship these upgrades to you because they require judgment calls on your specific bike. A Harley Touring model has different geometry than a Street Glide or a Road King. A shop that knows your bike makes those calls.
Electrical and Wiring: The Amazon Gray Zone
This is where you need to be thoughtful. Amazon has excellent wiring harnesses, fuse blocks, relay modules, and battery disconnect switches. The infrastructure is solid and affordable. But installation skill varies wildly.
Custom wiring harnesses for lighting, security, and audio upgrades are available and often cheaper than dealership equivalents. I’ve used quality harnesses for LED tail light conversions, auxiliary brake light kits, and driver communication modules. The advantage: they come with color-coded wires, connectors, and sometimes basic diagrams.
The catch: if you don’t understand motorcycle electrical systems (12-volt, negative ground, load calculations, fuse ratings), you can damage your bike, drain your battery, or create a fire hazard. I’ve seen baggers where poor electrical work caused a short that melted the wiring loom and created insurance headaches.
Here’s my rule: if it’s a bolt-on light kit with a self-contained harness and clear instructions, go for it. If you’re daisy-chaining relay modules, tapping into your main electrical bus, or running a high-draw audio or security system, consult a qualified motorcycle electrician or take a course on your bike’s electrical architecture first.
Alarm and GPS security systems are a solid Amazon category. Remote kill switches, GPS trackers, and motion sensors are affordable and increasingly plug-and-play. I use a motorcycle security system on my personal build—it gives me peace of mind at cruise nights where bikes are parked close together. Install takes 30 minutes to 2 hours depending on complexity. If it comes with a harness and relay, follow the instructions precisely. Don’t skip the ground wire or fuse; they’re not optional.
Engine kill switches and starter interrupt modules are legal, effective theft deterrents. These do require some electrical knowledge, but modern kits come with clear diagrams. I’ve installed a few, and the payoff is worth 45 minutes of careful work.
Chrome Care, Maintenance, and Protection: Amazon’s Sweet Spot
Once your bagger is built, keeping it showroom-ready is where Amazon shines. Cholo and lowrider aesthetics demand immaculate chrome, polished wheels, and pristine upholstery. The maintenance supplies are affordable and easy to ship.
Chrome polish and protectant kits are essential. I use a multi-step system: a chrome cleaner to remove road grime, a fine polish to restore shine, and a protective wax or sealant to lock it in. Brands like Turtle Wax, Mothers, and Meguiar’s all have solid chrome lines. A complete kit costs $20–$50, and one application protects for 2–4 weeks depending on weather and use.
Whitewall tire care and restoration products keep your sidewalls pristine. Whitewalls are a signature element of cholo style, and they stain easily from brake dust and road spray. Specialty whitewall cleaners and white tire paint pens are available; I’ve tested both. The cleaners work well for light staining; paint pens are a backup for deeper marks. Budget $10–$30 for a comprehensive whitewall maintenance kit.
Microfiber towels, soft-bristle brushes, and waterless wash systems make maintenance faster and safer than hose-and-sponge methods, which can trap grit. I keep a set of these in my garage and use them weekly during cruise season. They’re inexpensive ($15–$40 for a full kit) and extend the life of your paint and chrome significantly.
Upholstery protectants and leather care products keep your seat looking rich and new. Cholo baggers often feature custom leather or vinyl work, and protecting it from UV fade and staining is crucial. Leather conditioner and UV protectant sprays are easy ships, affordable, and highly effective. Apply monthly during riding season.
Paint protection film and ceramic coating products are newer options for DIY application. These create a hard, hydrophobic barrier on your tank, fenders, and frame. Self-application takes patience and clean conditions, but the results last 1–2 years and look professional. I’ve had good success with spray-on ceramic coatings designed for motorcycles.
Tires, Wheels, and Suspension Tuning: Know Your Limits
Whitewall and custom tire kits are available online, and installation is straightforward if you have a tire machine or access to a local shop. I don’t recommend DIY tire mounting unless you own the equipment; it’s dangerous and can damage the tire bead. But ordering whitewall tires online and having a shop mount them is a reliable workflow. Budget $150–$400 per tire depending on size and quality.
Spoke kit upgrades and wheel refinishing supplies are manageable DIY projects. Replacement spokes, nipples, and re-lacing tools are available. If you have a spoke wrench and patience, spoke replacement is doable. I’ve re-laced wheels in my garage, and it’s meditative work. Allow 2–3 hours per wheel and be prepared for some trial and error. If you’re not confident, a wheel specialist will re-lace for $100–$200 per wheel.
Suspension tuning kits—air pressure gauges, fork oil, shock fluid, and damping adjustment tools—are pure Amazon territory. If your bagger has adjustable suspension (which many touring models do), fine-tuning spring preload, compression, and rebound makes a huge difference in ride quality and handling. Buy a quality suspension pressure gauge and take your time reading compression curves. This is not rocket science, but it rewards patience.
Comparison: Bolt-On vs. Fabrication vs. DIY Electrical
| Upgrade Category | Bolt-On (Amazon) | Fabrication (Shop) | DIY Electrical (Caution) |
|---|---|---|---|
| Chrome foot pegs | ✓ 1 hour | — | — |
| Handlebar and grips | ✓ 30 min | — | — |
| LED lighting kits | ✓ 1–2 hours | — | ✓ if plug-and-play |
| Custom mirrors | ✓ 30 min | — | — |
| Frame drops | — | ✓ required | — |
| Extended forks | — | ✓ required | — |
| Hardtail conversion | — | ✓ required | — |
| Wiring harness (simple) | ✓ | — | ✓ intermediate |
| Security systems | ✓ | — | ✓ intermediate |
| Main electrical integration | — | ✓ recommended | — |
| Chrome polish/wax | ✓ | — | — |
| Whitewall care | ✓ | — | — |
| Tire mounting (custom) | ✓ order | ✓ mount | — |
| Spoke re-lacing | ✓ parts | — | ✓ advanced DIY |
| Suspension tuning | ✓ tools | — | ✓ if documented |
Real Talk: Fitment, Measurement, and Common Mistakes
I’ve made enough ordering mistakes to fill a parts bin. Here’s what I’ve learned:
Measure your existing components before ordering. Handlebar diameter, axle sizes, frame width, and tank clearance all matter. A fender accent that looks perfect in a photo might not clear your tire. I now take photos of my measuring tape against each component and keep notes in my phone. It takes five minutes and saves $50+ in returns.
Read fitment notes obsessively. Amazon listings often include “fits 2008–2020 Street Glide” or similar specificity. But “Street Glide” includes multiple generations with different frame geometry. If the listing doesn’t match your year and model exactly, contact the seller. A quick message can save hours of frustration.
Quality varies by brand. Cheap chrome foot pegs might look shiny for a month and then tarnish. Mid-range options (typically $30–$50 per set) last a season with minimal care. Premium options ($60+) can last years. I buy mid-range and plan for annual replacement or refinishing. That’s the honest economics of a show-ready bagger.
Return policies matter. Buy from sellers with flexible returns. Motorcycle parts are finicky, and a 30-day return window is your safety net. I avoid rock-bottom sellers without clear return language.
Shipping times vary with season. During cruise season (April–September in most U.S. regions), shipping is slower and more expensive. I place orders 4–6 weeks before I want to ride the upgrade. Plan ahead.
The Build Philosophy: What I Stand Behind
The cholo bagger is an art form, and it respects tradition. Low-and-slow is the mantra: low height, slow speed, clean details. That philosophy applies to upgrades too.
The best builds I’ve documented combine Amazon convenience (bolt-on chrome, lighting, maintenance) with skilled fabrication (frame work, suspension, custom touches). Neither alone creates something worthy of a cruise night or car show. Amazon is your accelerant, not your architect.
I’ve seen builds where a rider ordered $3,000 in bolt-on upgrades but skipped the frame drop and suspension work, resulting in a bike that looked half-finished and handled poorly. I’ve also seen shops that charged $8,000 for frame work on a bike without proper lighting, mirrors, or polished wheels. The sweet spot is balance: invest in fabrication that changes geometry and safety, and use Amazon for the visual flourishes and maintenance infrastructure.
Take your time, measure twice, read reviews from riders building similar models, and don’t rush the process. A bagger built over two years and finished properly will turn more heads than one assembled in three months with shortcuts.
FAQ
What Amazon products give the most visual impact for the least money?
Custom LED tail light bezels and mirror housings are my top recommendations. A pair of chrome extended mirrors runs $40–$80 and is visible from any angle. Pair that with a whitewall tire care kit ($20–$30) and you’ve got a $100 upgrade that looks like $500. Focal point, clean maintenance, immediate results.
Can I drop a frame using Amazon parts?
Not safely. Amazon sells lowering kits for specific models—pre-fabricated drop units and spacers—which are legitimate and can save 50% off a full custom drop. But a true custom frame drop requires welding, geometry verification, and skilled labor. If your bike model doesn’t have a bolt-on kit, budget for fabrication. Don’t try frame cutting in a residential garage without equipment and experience.
What’s the best security system for a parked bagger?
A combination approach: a motion-sensor alarm (which deters casual theft), a GPS tracker (which helps recovery if stolen), and a visible lock and cable (which makes your bike a harder target). Most of these are available on Amazon for $100–$300 total. Install takes 1–2 hours. I’ve never had a bike stolen with this setup, but I also park it under a camera when possible.
How do I know if an electrical upgrade will work on my bike?
Check the listing for your exact year and model. If it doesn’t list your model, contact the seller. For DIY electrical work, consult your bike’s service manual for voltage, ground location, and fuse capacity. If the upgrade draws more than 10 amps, use a dedicated relay and fuse. When in doubt, have a qualified motorcycle electrician inspect your work.
Is it worth buying a spoke re-lacing kit instead of hiring a wheel specialist?
If you have one or two wheels to do and enjoy mechanical work, yes—you’ll save $100–$200. If you need to re-lace four or more wheels or want guaranteed results, hire a specialist. Re-lacing is meditative and rewarding if you’re patient; it’s frustrating if you’re rushed. Tools cost $30–$50, so try it once and see if it fits your style.
Can I build a lowrider-style bagger entirely from Amazon without a shop?
No. The frame and suspension work that defines the lowrider aesthetic (drops, extended forks, hardtail) require fabrication. You can bolt on 80% of the visual details yourself, but that foundational 20% needs skilled labor. Plan for $2,000–$5,000 in shop work to get the geometry and safety right, then use Amazon for the chrome and maintenance supplies. That’s the honest path to a bike you’ll be proud to ride.