
Vicla Bagger Start Here: Amazon Gear vs Custom Shop Work
Building a Vicla-inspired lowrider bagger is one of the most rewarding projects a rider can tackle—but the decision between sourcing parts on Amazon and taking your bike to a custom shop sets the tone for everything that follows. After years of documenting builds in my garage and at cruise nights, I’ve learned that there’s no one-size-fits-all answer; instead, smart riders combine both paths, knowing when to DIY and when to hand off the work to a specialist.
This guide walks you through that decision-making process, shows you what’s realistic to tackle yourself versus what demands professional attention, and helps you build a budget that won’t drain your account before you even hit the road.
Key Takeaways
- DIY Amazon parts (chrome cleaner, whitewall kits, security gear, seat covers) save money and let you learn your bike’s details, but require patience and elbow grease.
- Custom shop work (frame modifications, extended swing arms, airbag systems, paint) is worth the investment because a mistake costs more to fix than the original labor.
- Hybrid approach splits the difference: source bolt-on cosmetics yourself, reserve shop time for structural and electrical work.
- Timeline and skill matter: a first-time builder needs 6–12 months for a respectable cruiser; rushing either path leads to regret.
- Budget reality: budget $3,000–$8,000 for a solid Amazon-sourced cosmetic build, $15,000+ for custom shop modifications that transform the bike structurally.
Why Vicla Baggers Attract Both Paths
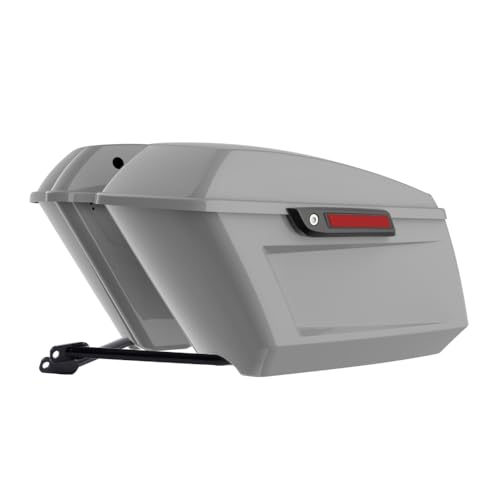
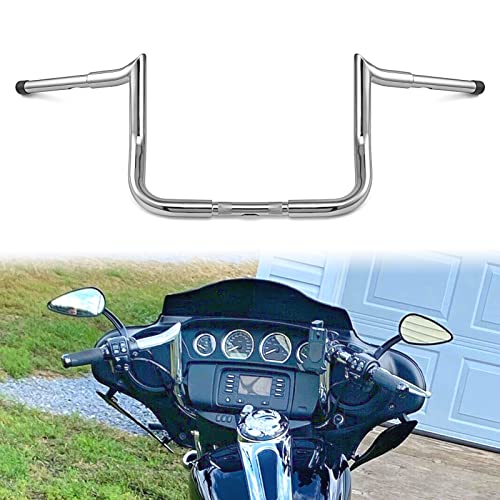
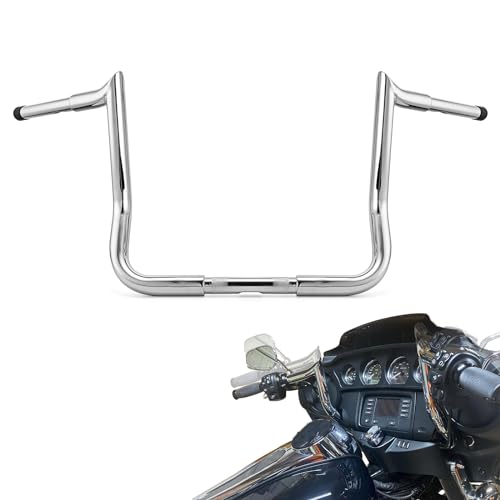
A Vicla bagger—that low-and-slow aesthetic rooted in Los Angeles lowrider culture adapted for baggers—pulls from two worlds. You’ve got the OEM motorcycle structure (engine, frame, factory controls) and then you’ve got the customization layer: stretched fenders, extended forks, hand controls, hydraulics or air suspension, whitewall tires, and chrome details that catch light at every stoplight.
That’s where the fork in the road appears. Some of those modifications demand metal work, welding, and precision measurement. Others are purely cosmetic and bolt-on friendly. I’ve seen riders make smart choices by doing their own research, buying the right tools, and knowing their limits—and I’ve seen others waste money on Amazon parts that don’t fit or work because they skipped the planning phase.
The Vicla bagger community thrives on transparency. Riders share their builds online, document setups, and help each other troubleshoot. That same spirit applies here: understand what you’re buying into before you buy.
Understanding the Amazon DIY Path
What You Can Realistically Do Yourself
Chrome and finish work is the sweet spot for DIY. Buying chrome cleaner, chrome polish, microfiber towels, and protective wax on Amazon means you own the process. I’ve spent Sunday mornings with a soft-bristle brush, a good chrome polish, and a few hours of focused work—and the results rival what a professional detail shop charges $200+ for. You learn your bike’s geometry, you develop a feel for the metal, and you end up with arms-on knowledge of every inch.
Whitewall tire kits come as complete packages—paint, applicator, clear coat—and if you follow instructions and mask your wheel properly, they look factory fresh. Same with seat covers and saddlebag liners: these are bolt-or-stitch affairs that anyone comfortable with basic tools can handle.
Security and lighting upgrades (alarm systems, accent LED strips, horn upgrades) are plug-and-play if your wiring is clean. I’ve installed dozens of these with nothing more than a multimeter, a wire stripper, and patience.
Cables and controls (braided brake lines, handlebar grips, hand lever upgrades) are straightforward swaps if you’re mechanical-minded. A service manual and a YouTube video go a long way.
The Hidden Costs of DIY
Here’s what I wish I’d known earlier: Amazon DIY parts require tools you may not already own. A pneumatic impact wrench, a torque wrench, metric socket sets, a jack, jack stands—if you’re starting from zero, that’s $300–$600 before your first part comes out of the box. Factor that into your budget.
Time is the second hidden cost. A professional shop finishes a chrome detail in a day. You’re looking at 4–6 Saturday mornings, each one preceded by a trip to get supplies you forgot. If you’re working full-time and have family commitments, this adds months to your project.
Mistakes happen. I once installed a hand control cable incorrectly, and it bound up under full throttle—I was lucky it was at low speed in my driveway. The fix required undoing an afternoon’s work and sourcing a longer routing path. The part cost $20; the lesson cost me peace of mind and four hours.
Returns and compatibility issues are real. You order a bagger-specific seat, it arrives, and it doesn’t sit level on your particular frame. Now you’re managing a return window, waiting for a replacement, and losing momentum on your build. Custom shops have relationships with manufacturers and often know these quirks upfront.
The Custom Shop Route: When It Makes Sense
Structural and Electrical Work Belongs in a Professional’s Hands
Extended forks, stretched frames, and swing arms require precision welding, frame jigs, and alignment equipment that cost tens of thousands of dollars to own. A shop has already invested in that infrastructure and knows how to avoid common pitfalls (like weakening a frame at a critical stress point or creating a geometry that handles poorly at speed). I’ve seen home-garage welders produce decent-looking work that fails within a season because the heat-treat wasn’t right or the joint wasn’t properly stress-relieved. It’s not worth the risk.
Airbag suspension systems involve hydraulic lines, electrical integration, and ride-height management. An installation error doesn’t just cost money—it can leave you stranded, cause brake failure, or create a handling issue that surprises you at 60 mph. Shops have the diagnostic tools, pressure gauges, and experience to get this right the first time.
Wiring harnesses for hand controls, cruise control, security systems, and sound systems are increasingly complex. Modern motorcycle electrical systems are computer-managed, and a mistake can corrupt your bike’s ECU or cause an intermittent fault that takes a technician hours to diagnose. If you’re not confident with a multimeter and a service manual, hire the work.
Paint and detailed body work deserves a professional shop, period. Vicla aesthetics often include matte black panels, two-tone designs, or ghosted graphics—finishes that demand proper prep, primer, spray technique, and clear-coat application. A $400 paint job from a low-end place will peel in six months. A $2,500 job from a reputable shop lasts years.
How Custom Shops Add Value
A good shop doesn’t just turn a wrench; they troubleshoot. They’ve built dozens of Vicla baggers and know which OEM components resist modification and which companies’ aftermarket parts fit reliably. They source parts directly, avoid counterfeit stock, and often offer warrantees on their work. When something goes sideways during installation, they fix it without billing you again because their reputation depends on it.
I visited a shop in East LA where the owner has been modifying baggers for twenty years. He told me that 60 percent of the work he does involves fixing mistakes from home builds or cheap shops. That’s a revenue stream, sure, but he approached it with respect—he understood that riders trusted him with their bikes and their vision.
A custom shop also manages timelines and logistics. They order batches of quality parts, keep inventory, and coordinate with frame builders or paint specialists as needed. You drop your bike off, and instead of spending six months chasing parts, you check in every two weeks and get a real update.
Realistic Custom Shop Pricing
A full frame stretch and extended fork kit installation runs $3,000–$6,000 in labor alone, not including parts. Add a set of quality stretched forks ($2,500–$4,000), a custom extended swing arm ($1,500–$3,000), and you’re looking at $7,000–$13,000 before paint, wheels, or chrome.
Airbag suspension installation is $2,500–$4,500, and quality air suspension components are another $3,000–$6,000.
Full wiring and hand control integration is $1,500–$2,500, depending on complexity.
A complete build with all these elements—frame mods, suspension, wiring, paint, and detail work—easily runs $25,000–$45,000. That’s not a budget killer if you’re building over two years and spreading costs. It becomes one if you expect a radical transformation for $10,000.
Hybrid Strategy: The Smart Middle Ground
The most successful Vicla bagger builds I’ve documented followed a hybrid model: source cosmetics yourself, commission the heavy work to pros.
Here’s how I’d structure it:
Year One, Months 1–3: Stock your garage with Amazon-sourced detail supplies, cable kits, and bolt-on accessories. Install hand controls, braided lines, new grips, and lighting. Learn your bike’s layout and develop a relationship with your service manual. Budget: $800–$1,500.
Year One, Months 4–6: Commission a custom shop for frame evaluation and suspension planning. Get a quote for the structural work (extended forks, swing arm, possible frame stretch). Place the bike on blocks and prepare for longer modifications. Budget: $5,000–$15,000, depending on scope.
Year One, Months 7–9: While the shop handles metal work, order wheels, tires, and cosmetic chrome pieces from Amazon. Study installation videos and prepare to DIY whatever bolt-on work you can. Budget: $2,000–$4,000.
Year One, Months 10–12: Suspension goes in, wiring gets professionally integrated, and paint is applied by a specialist. You’re assembling bolt-on parts, detailing chrome, and preparing the interior (seat covers, saddlebag liners, cable covers). Budget: $5,000–$8,000.
Result: A cohesive, mechanically sound Vicla bagger with your personal touch in the details, completed in a realistic timeframe without catastrophic mistakes or budget overruns.
DIY vs. Custom Shop Comparison Table
| Task | Amazon DIY | Custom Shop | Recommendation |
|---|---|---|---|
| Chrome cleaning & polishing | ✓ Best choice | ✗ Overkill | DIY; learn your bike |
| Whitewall tire kits | ✓ Good choice | ✗ Not offered | DIY with patience |
| Hand controls & cables | ✓ Good for experienced riders | ✓ Available | DIY if mechanical; shop if unsure |
| Bolt-on seat covers & liners | ✓ Best choice | — | DIY; saves money |
| LED accent lighting | ✓ Good; plug-and-play | ✓ Available | DIY simple kits; shop for integration |
| Extended forks installation | ✗ Risk too high | ✓ Best choice | Custom shop only |
| Frame stretch/modifications | ✗ Dangerous | ✓ Best choice | Custom shop only |
| Airbag suspension setup | ✗ Requires tools & expertise | ✓ Best choice | Custom shop only |
| Wiring harness integration | ✓ Possible; high learning curve | ✓ Recommended for complex systems | Shop for cruise control, security, sound |
| Paint & body work | ✗ Results suffer | ✓ Best choice | Custom shop only |
| Braided brake lines | ✓ Best choice | ✓ Available | DIY; straightforward |
| Sound system installation | ✓ Possible; complex | ✓ Recommended | Shop if touchscreen or amp integration needed |
Building a Realistic Budget
Lean DIY Build (mostly Amazon, minimal shop work)
- Chrome and detail supplies: $600
- Cables, controls, grips: $800
- Wheels and tires (aftermarket): $2,000
- Seat and saddlebag upgrades: $500
- Lighting and security: $400
- Shop labor (basic alignment, wiring check): $800
- Total: ~$5,100
- Timeline: 8–10 months
- Result: Cleaner, personalized cruiser; structurally stock
Moderate Hybrid Build (balanced DIY and shop work)
- DIY cosmetics and bolt-ons: $2,000
- Extended forks and installation: $5,000
- Airbag suspension: $5,000
- Paint and detail: $3,000
- Chrome and finishing: $1,000
- Total: ~$16,000
- Timeline: 12–15 months
- Result: Lowrider aesthetic, custom handling, professional finish
Full Custom Shop Build (maximum transformation)
- Complete frame and suspension overhaul: $12,000
- Paint, body, and detail work: $5,000
- Wiring and electrical integration: $2,000
- Chrome, trim, and cosmetics: $2,000
- Wheels, tires, and rubber: $3,000
- Interior (seat, saddlebags, lining): $2,000
- Total: ~$26,000
- Timeline: 16–20 months
- Result: Full Vicla aesthetic, show-quality finish, professional engineering
Your First Steps: A Practical Checklist
-
Document your vision with photos and video from rides, shows, and online galleries. Know what you’re aiming for before you buy anything.
-
Find a reputable shop by asking local Vicla riders, checking online reviews, and visiting in person. Ask about their experience with your specific bike model and style.
-
Get written quotes from at least two shops. Include a detailed list of modifications, timelines, and warranty terms.
-
Invest in basic tools if you don’t have them. A quality jack, jack stands, socket set, and multimeter are non-negotiable.
-
Start with cosmetics on Amazon—chrome care, seat covers, cable management. This builds confidence and knowledge without high risk.
-
Join online Vicla communities and ask questions. Riders are generally generous with advice, and you’ll learn the pitfalls before you hit them yourself.
-
Plan your budget in phases rather than lump sums. Spread costs over 12–18 months to avoid financial strain and decision fatigue.
FAQ
What’s the biggest mistake Vicla bagger builders make?
Trying to do too much themselves too fast. I’ve seen riders order extended forks, a frame kit, and a suspension system all at once, then attempt installation in their driveway over two weekends. Something always goes wrong—geometry is off, fasteners strip, or the suspension doesn’t bleed properly—and they’re frustrated before the bike ever rolls down the street. Start small, build skills, and know your limits. A $2,000 mistake in chrome polishing is forgivable; a $10,000 mistake in frame alignment is not.
Can I really get quality motorcycle parts on Amazon for a Vicla build?
Yes, with caveats. Established brands like Harley-Davidson OEM parts, major cable manufacturers, and name-brand chrome polish are legitimate and reliable. What you need to watch for: counterfeit suspension components, low-quality paint kits, and “bagger-specific” parts from sellers with no reviews. Read reviews carefully, check return policies, and order from sellers with verified motorcycle expertise. When in doubt, call a shop and ask their recommendation.
How long does a typical Vicla bagger build actually take?
If you’re realistic about it, 12–18 months for a respectable hybrid build. That’s not continuous work; it’s stretched across weekends, paychecks, and seasonal weather. A full custom shop build might take 6–8 months of shop time, but you’re only directly involved during consultations and delivery. Rushing either path results in compromises or mistakes. I’ve never regretted taking my time; I’ve regretted every project I tried to hurry.
Should I buy air suspension or stick with springs?
That depends on your budget, your riding style, and your aesthetic goals. Airbag systems ($5,000–$8,000 installed) give you the ability to adjust ride height for parking and cruising, which is integral to Vicla culture. They also ride smoother and handle better at speed than springs alone. If you’re building a show bike or a dedicated cruiser, air suspension is worth it. If you’re on a strict budget and want reliability, quality coil-over springs ($2,000–$3,500 installed) are respectable and proven. A good shop can help you decide based on your specific bike and goals.
Is it worth getting a professional paint job or should I try it myself?
Get a professional paint job. I’m not saying this to dismiss DIY spirit—I’m saying it because even a small mistake in prep or application costs more to fix than the original job. Vicla aesthetics often rely on flawless finish and vivid color. A $400 paint job might look good for three months until weather and road salt start showing imperfections. A $2,500–$4,000 shop job lasts years and holds your resale value. Paint is one area where DIY almost always disappoints.
What’s the best place to start if I’m completely new to motorcycle maintenance?
Start with cosmetics and learning your bike’s layout. Buy a service manual for your specific model, watch YouTube videos from reputable channels, and get comfortable with basic tool use. Install grips, cables, and bolt-on parts before you touch anything electrical or structural. Spend a month just cleaning and detailing your chrome—you’ll develop a tactile relationship with the bike and understand where every part lives. By the time you’re ready for professional work, you’ll have a clear picture of what you need done and why.