
Buying handlebars for a bagger isn’t just about style—it’s about fit, comfort, control, and ensuring your cruiser’s personality shines through. Whether you’re low and slow on a Vicla-inspired rig or rolling a cholo-style ride, knowing what to consider before you buy your bars can save you from headaches at the shop or the road.
Key takeaways
- Handlebar height, width, and pullback affect riding comfort, control, and overall look.
- Compatibility with your bike’s wiring and controls is crucial; not all bars support the same setups.
- Chrome versus black finishes require different maintenance routines to keep your lowrider gleaming.
- Measuring your original handlebars and considering your riding style helps narrow choices.
- Installation tools and prepping wiring in your garage are just as important as the bars themselves.
Why handlebars matter for your bagger build
When you roll out your Vicla, lowrider, or classic cholo-style bagger, handlebars do more than just hold your grip—they shape your ride. For me, swapping bars was a game-changer: the right height let me keep my back comfortable during long cruises, while the right sweep and pullback helped me corner with ease.
Choosing handlebars influences:
- Riding posture: Taller bars mean a more upright stance; shorter bars lean you forward.
- Control: Wider bars offer leverage; narrower can feel twitchy.
- Wiring complexity: Fat bars need longer cables and extended wiring.
- Style points: From ape hangers to mini-apes or drag bars, your bars are a visual signature on your build.
Before pulling the trigger on your handlebars, measure carefully, think about wiring, and reflect on how each option will work with your specific bagger setup.
Measuring and evaluating your current setup
One of the first things I do in my garage is measure the bars currently on my bike. This tells me a baseline for what to improve—and what to avoid.
Key measurements:
- Rise (height): From the top clamp to the highest point of the bar
- Width: Grip end to grip end, measured straight across
- Pullback (reach): How far the grips pull back towards the rider
- Clamp diameter: Critical for compatibility with risers and controls (common sizes 1”, 1 1/4”)
To measure accurately, I use a tape measure and mark points with blue painter’s tape to ensure repeatable measurements. You want bars that fit your ergonomics—too tall or too wide can cause strain. I’ve found making shorter test rides with different styles can help, but that’s not always possible before buying.
Handlebar styles and their impact on bagger builds
Handlebar shape plays into both comfort and bagger style. Here are the most common types you’ll run into for baggers:
| Style | Description | Pros | Cons | Best for |
|---|---|---|---|---|
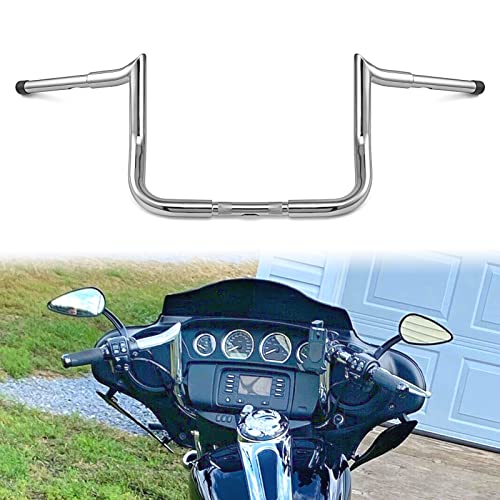
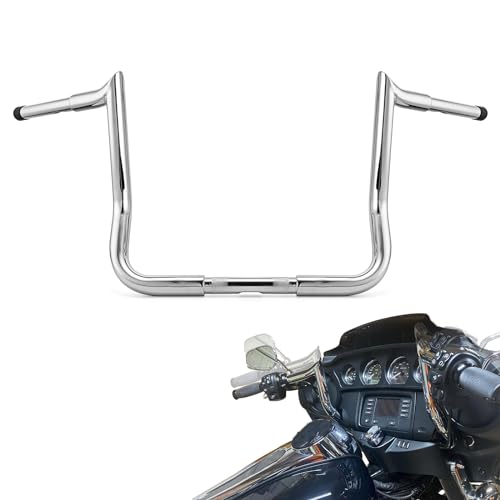
| Ape Hangers | High-rise bars, usually 12” and up rise, grips above shoulder height | Signature cholo look, upright posture | Can cause fatigue on long rides | Classic lowrider, Vicla |
| Mini Apes | Lower rise (6-12”), similar shape but less extreme | Easier control, less fatigue | Still somewhat tall | Cruise-night style builds |
| Drag Bars | Straight across or slight bend bars, no rise | Sporty stance, great control | Less comfortable for long haul | Aggressive baggers |
| Buckhorn Bars | Curved back toward rider, moderate rise and pullback | Relaxed reach, vintage look | May be too low for some | Vintage Vicla or classic builds |
| Z Bars | Angular, multi-segmented with sharp bends | Aggressive look, unique styling | Can be uncomfortable | Custom show builds |
In my Vicla builds, I’m partial to mini apes—they give just enough height and comfort without losing control. For cholo-inspired setups, ape hangers are the go-to for that authentic look, but I make sure the rise remains manageable for long evenings at the cruise.
Compatibility and wiring considerations
One of the hardest lessons I learned was that not every handlebar will plug-and-play with your stock wiring and controls. If you pick a bar with different diameter or routing, it might require longer brake lines, throttle cables, or wiring extensions.
What to check:
- Grip and control mount diameter: Most baggers use 1” or 1 1/4” bars. Controls must match or risers need adapters.
- Wiring inside bars: Many barkers run wiring internally to keep a smooth look. Bars with tricky bends or oversized rise may complicate wiring.
- Brake and clutch cable length: Extended handlebars demand longer cables and lines.
- Switch housing fitments: Ensure your switch housings fit on the chosen bar diameter.
I always test-fit my controls before committing to a new bar. If you need to order longer cables or lines, order those in advance to avoid downtime. Patience in wiring prep pays off in a clean, snag-free install.
Chrome vs black vs custom finishes: What to expect
Finish durability and maintenance should factor into your choice. Few things kill the vibe on a freshly built lowrider bagger like pitted handlebars or rust spots.
- Chrome handlebars: Classic look for Vicla and cholo builds. Chrome shines but requires diligent cleaning and waxing with products like Mothers Chrome Polish.
- Powder-coated black or matte: Hides fingerprints and scratches better but can chip if handled roughly.
- Raw steel or brushed: Unique and vintage, but needs waxing or sealant to avoid rust quickly.
Over the years, I’ve found that gentle cleaning using microfiber cloths and dedicated chrome care products extends bar life remarkably. Avoid abrasive sponges or household cleaners.
Tools and workflow for installing your new handlebars in the garage
Replacing handlebars isn’t just swapping parts—it’s a process. Here’s my go-to workflow in my garage, which helps keep the install clean and efficient:
- Stabilize the bike on a lift or secure stand.
- Disconnect battery for safety.
- Remove mirrors, grips, switches, and controls carefully.
- Label all wiring connectors for easier reinstallation.
- Loosen and remove old handlebars using torque wrenches to avoid stripping bolts.
- Pre-route wiring and lines through new bars, verifying cable length.
- Install controls and switches on new bars ensuring tight fit.
- Check all moving parts for snag or binding.
- Reconnect battery and test lights, signals, throttle, brakes before final tightening.
- Tighten bars to factory specs, use thread locker if recommended.
Patience pays off in making sure your new bar setup functions flawlessly and looks pro.
Key Handlebar Comparison Checklist for Baggers
| Feature | Ape Hanger | Mini Ape | Drag Bar | Buckhorn | Z Bar |
|---|---|---|---|---|---|
| Rise (inches) | 12+ | 6–12 | 0–3 | 4–8 | 3–6 |
| Typical Width (inches) | 28–32 | 26–30 | 24–28 | 26–30 | 24–28 |
| Pullback | Moderate to High | Moderate | Minimal | Moderate | Moderate |
| Control comfort | Low for long rides | Moderate | High | Moderate | Low to Moderate |
| Wiring complexity | High | Medium | Low | Medium | Medium |
| Style appeal | Classic cholo | Lowrider vibe | Sporty | Vintage | Custom/Show |
| Maintenance | Chrome care key | Chrome or paint | Easy | Regular care | Regular care |
Related reading
- Best motorcycle phone mounts for ape hanger bars
- Amazon gear mistakes Vicla builders regret buying twice
- Best drink holders and highway peg comfort accessories
- Best motorcycle tool rolls for bagger riders
- Amazon garage setup for a lowrider motorcycle builder
FAQ
What height handlebars are best for baggers?
There’s no one-size-fits-all, but most bagger riders find 8 to 12 inches rise comfortable for upright posture without arm fatigue. Mini apes around 8-10” strike a good balance.
Can I run stock wiring on aftermarket bars?
It depends on the bar’s diameter and internal routing. Bars with extreme rise or bends often require longer cables or wiring extensions. Test fit controls before final install.
How do I maintain chrome handlebars?
Use a dedicated chrome polish like Mothers Chrome Polish, gentle microfiber cloths, and avoid scrubbing pads. Cleaning after rides and waxing periodically prevents rust and dull spots.
Are wider handlebars better for control?
Wider bars can provide leverage and easier turning but may be cumbersome in traffic or tight areas. Narrow bars improve maneuverability but can feel twitchy at speed.
Can I install handlebars myself without a mechanic?
With the right tools, patience, and knowledge of your bike’s wiring and cabling, yes. Follow a step-by-step approach and ensure safety by disconnecting the battery and testing all controls after install.
Before buying handlebars for your bagger, think beyond style. Fit, wiring compatibility, and finish care will shape your ride more than you might expect. Over the years, focusing on these elements helped me turn my garage into a low-and-slow sanctuary, where every part feels just right on the streets or at cruise night.
— Miguel Vega